Changing a Turn Signal Bulb in Honda Civic VIII Hatchback
Modern cars are known to be really hard to repair. Some of the parts are really not easy to reach. Changing the blinker bulb in this the Honda Civic Hatchback will cost you 150 Euros because of it.
This article is a DIY guide. I'll show how to change this bulb without building your car completely apart. No taking off the front bumper is required, neither getting out the head lights. Read ahead to see in photos the famous forum trick.

Let's start with a nice photo from Switzerland of the Honda I will repair. And continue with the disclaimer: Bear in mind, wheels and turn signals of your car are safety-relevant components. Take this instructions with care, and do everything you will do under your own responsibility. Save yourself time and money, pay 150 Euros for the change, if you have no experience with car repairs, instead of following this guide. Be careful when you work! Use proper clothing and instruments, protect your eyes and be careful when lifting the car. Be very cautious with the jack and secure it properly as in the manual for it. A car falling off the jack might injure you very badly! Failing to do these all manipulations safely and carefully might result in serious injuries and even death. In no way I am responsible for your actions and their consequences in connection to the information presented here! Act on your own risk, please, and if you are not sure, trust this job to your favorite car shop better.
Disclaimer On this web site you might read about
or get access to various kinds of software and technology, including but not limited to libraries,
operating systems, software for communications, mobile phones and tablets,
Android software and Linux, even cars and motorcycles, security and penetration testing software,
software used in security research and forensics, some samples of software which can be
used (elsewhere) for malicious or illegal purposes. You will read about or be provided with
the ways to change it, to operate it and to use it. You might find advice and recommendations,
which are only an opinion, and not a legal advice or commercial recommendation..
Bear in mind, please, that everything you do, you do solely at your own risk
and responsibility. In no way the author of this web site, information, graphics
and other materials presented here or related to it can be made liable or
anyhow else responsible for your own actions as well as
actions of any third party and their direct or indirect results or consequences
with or without the use of this information as well as the software,
technology and systems mentioned and/or presented here,
no matter if developed by the author or by any third party.
In no way it is guaranteed that you will meet any suitability for
any particular purpose, safety, security, legality or even simply
functioning of the software and systems described here. You have to make
sure each time yourself, whether what you do, is really what you intend to
do, and that you are ready to be yourself responsible for. All the recommendations
and experiences described here are the opinions of corresponding authors and
are to be taken with care and own full responsibility.
The software provided
on or through this web site, linked to from this web site or anyhow else
related to this web site is provided by the corresponding authors on their
own terms. We provide all the software here as is without any guarantees to you.
You are responsible for deciding whether it is suitable for you or not.
You are also responsible for all direct or indirect consequences of using this
software.
Other web sites linked to from the current one are out of the author's control,
we can not guarantee anything about their content, its quality or even legality. We
can not be liable for any use of the linked to web sites or of the information presented there.
We reasonably try to keep this website running smoothly and to deliver
information to the best of our knowledge corresponding to the state of the art at the times
when the information is composed, usually presented together with the information, and out of good intents.
We can not however guarantee and can not be liable for this website being temporarily or permanently
unavailable, presenting unreliable information or software, or any other similar or not malfunctioning
or functioning not up to your expectations as well as any consequences
which might result from this site's operation.
OK, now when you are warned, let's go straight to the business.
The car model I am going to repair
On the photos I do it with the 8th Civic Hatchback. The fridge which came out of the space.
It is Honda Civic 5d Hatchback FK1 2008 with 1.4L engine.
This guide shall also apply to the 3d hatchback and to the FN models.
Seems like the facelifts of 2009 and 2011 do not change much when it comes to the frontal headlight turn signals either, so the guide might apply too.
What I am going to repair
We are going to replace the bulb in the left frontal turn signal, or blinker. It is the blinker in the head lights, and not the one in the mirror.
What is so special about this guide?
The official Honda service manual requires you to take off the front bumper and to take out the head lights to change a single bulb!!. Next you'll have to put the headlights back and tune them. This is whole a lot of work!
This current guide helps you to avoid a lot of unnecessary work by changing the bulb from the side of the wheel. We will free partially the plastic under the left fender and change the lamp right after it. Optionally you might want to lift your car on the jack, and take off the wheel to let you work more conveniently, but it is not necessary.
Such work is doable at home, if you have basic car tools and know how to use them. But even the servicemen can save their time, by following this guide.
How-to in just a few steps with photos
- Get the new light bulb.
- Wash the car before you begin.
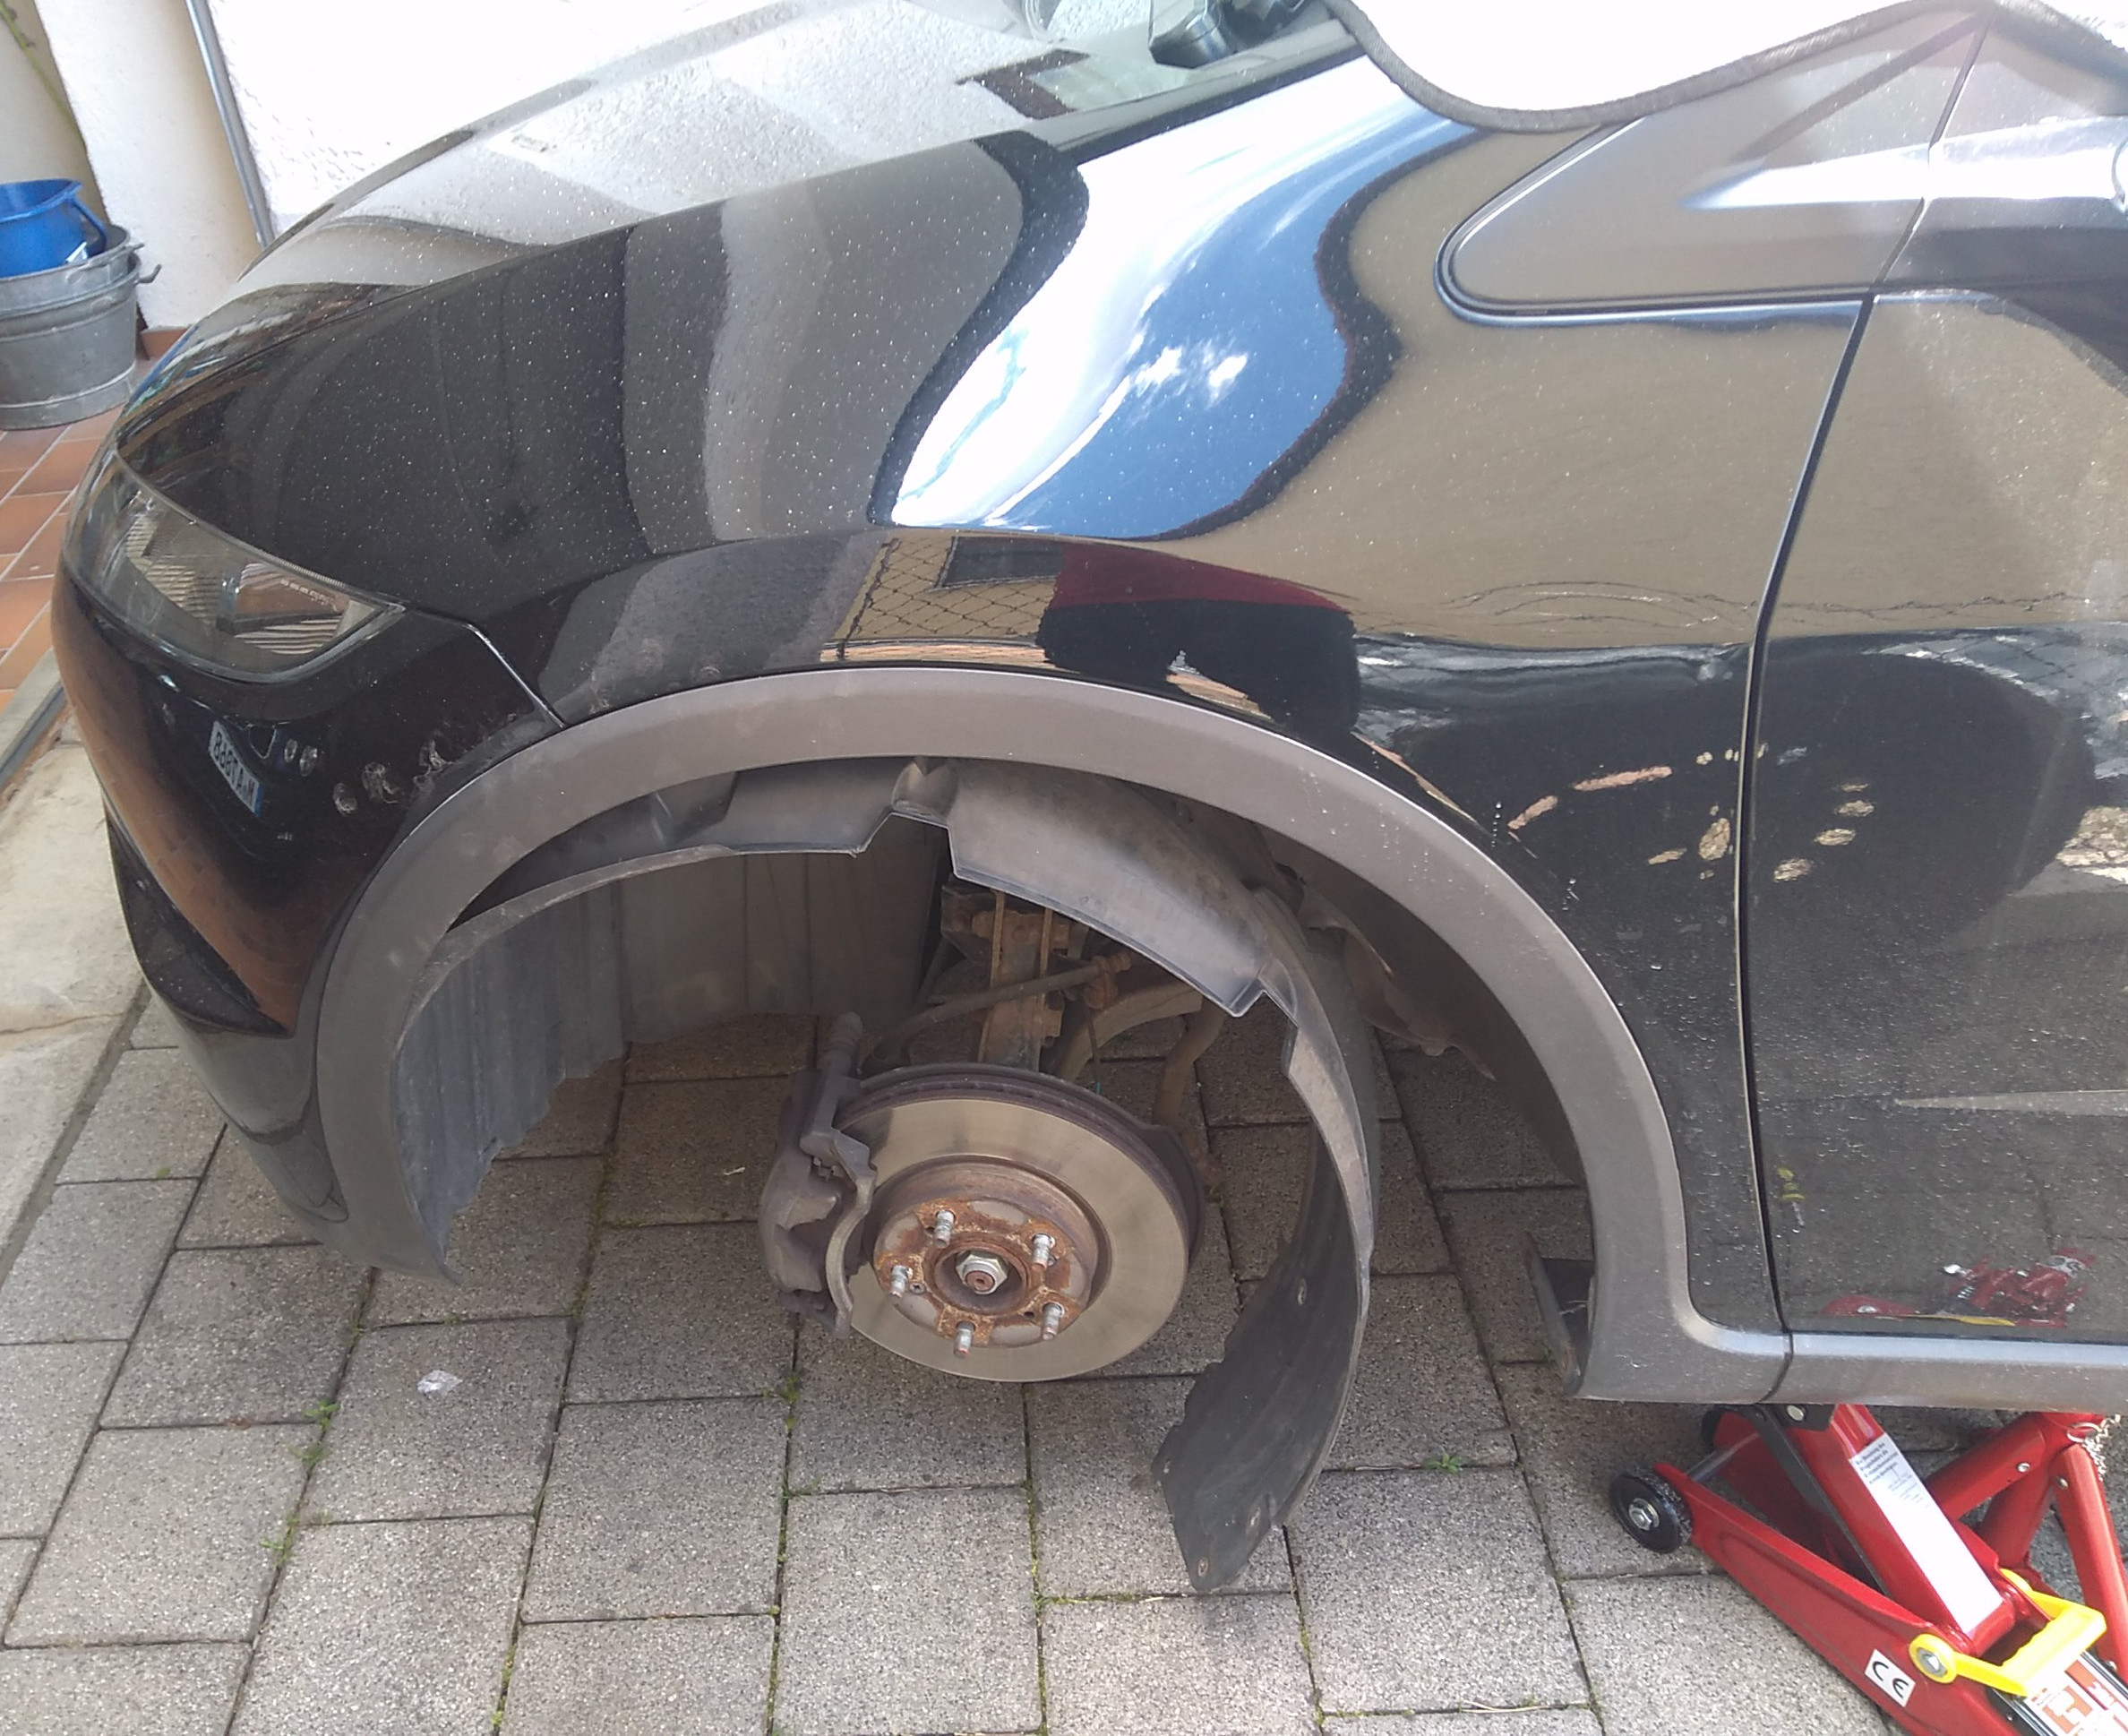
- Put your cat on the jack and build the wheel off.
The picture shows, what we want to achieve eventually.

Be careful when you use the jack! Get a static holder to securely bring down your car on several support surfaces. You do not want your car falling on you when you are in the middle of the work!
- Start from the bottom-right side as on the picture above, from near the front-low end of the door to unmount the plastic under the fender.
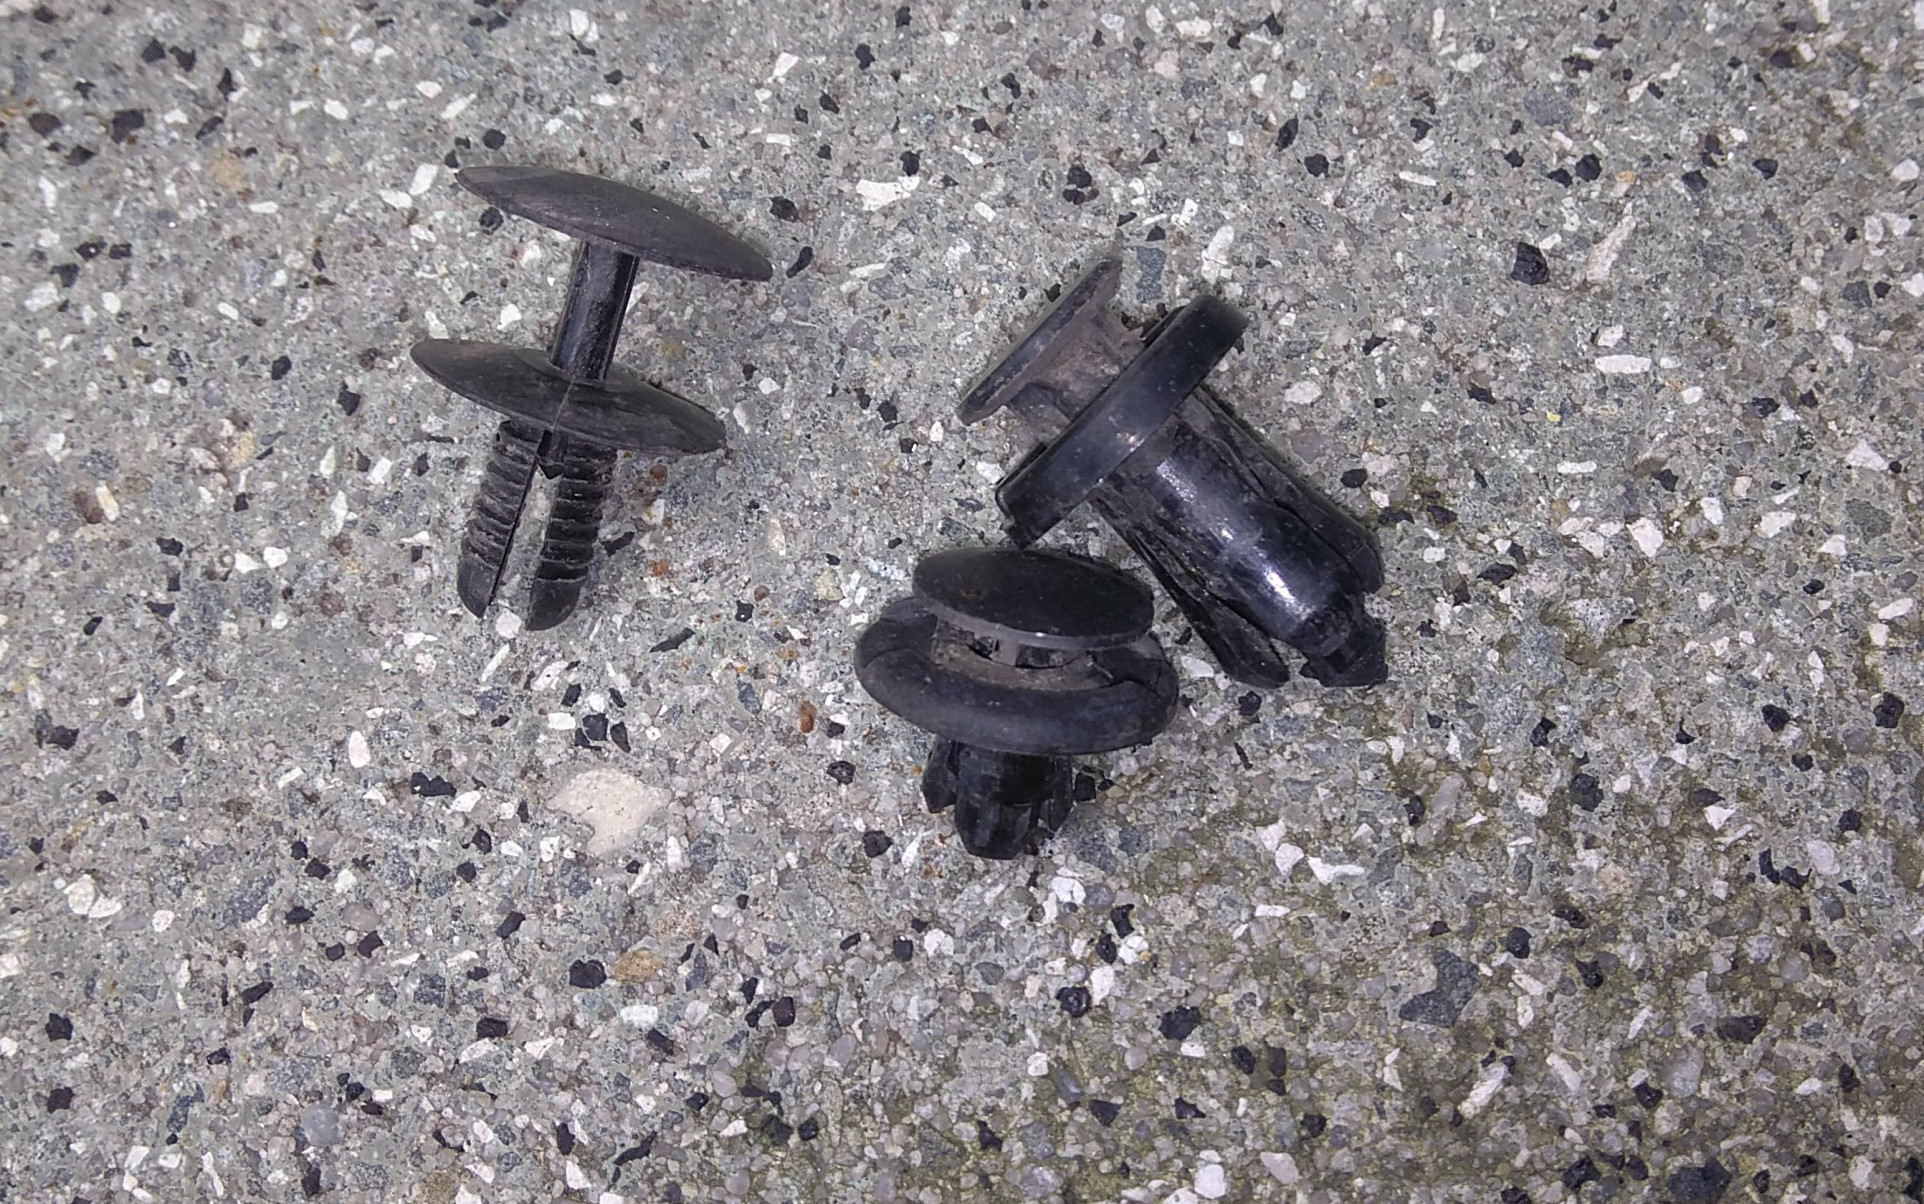
- Unscrew several screws and unmount several plastic clips holding the fender plastic to the car.
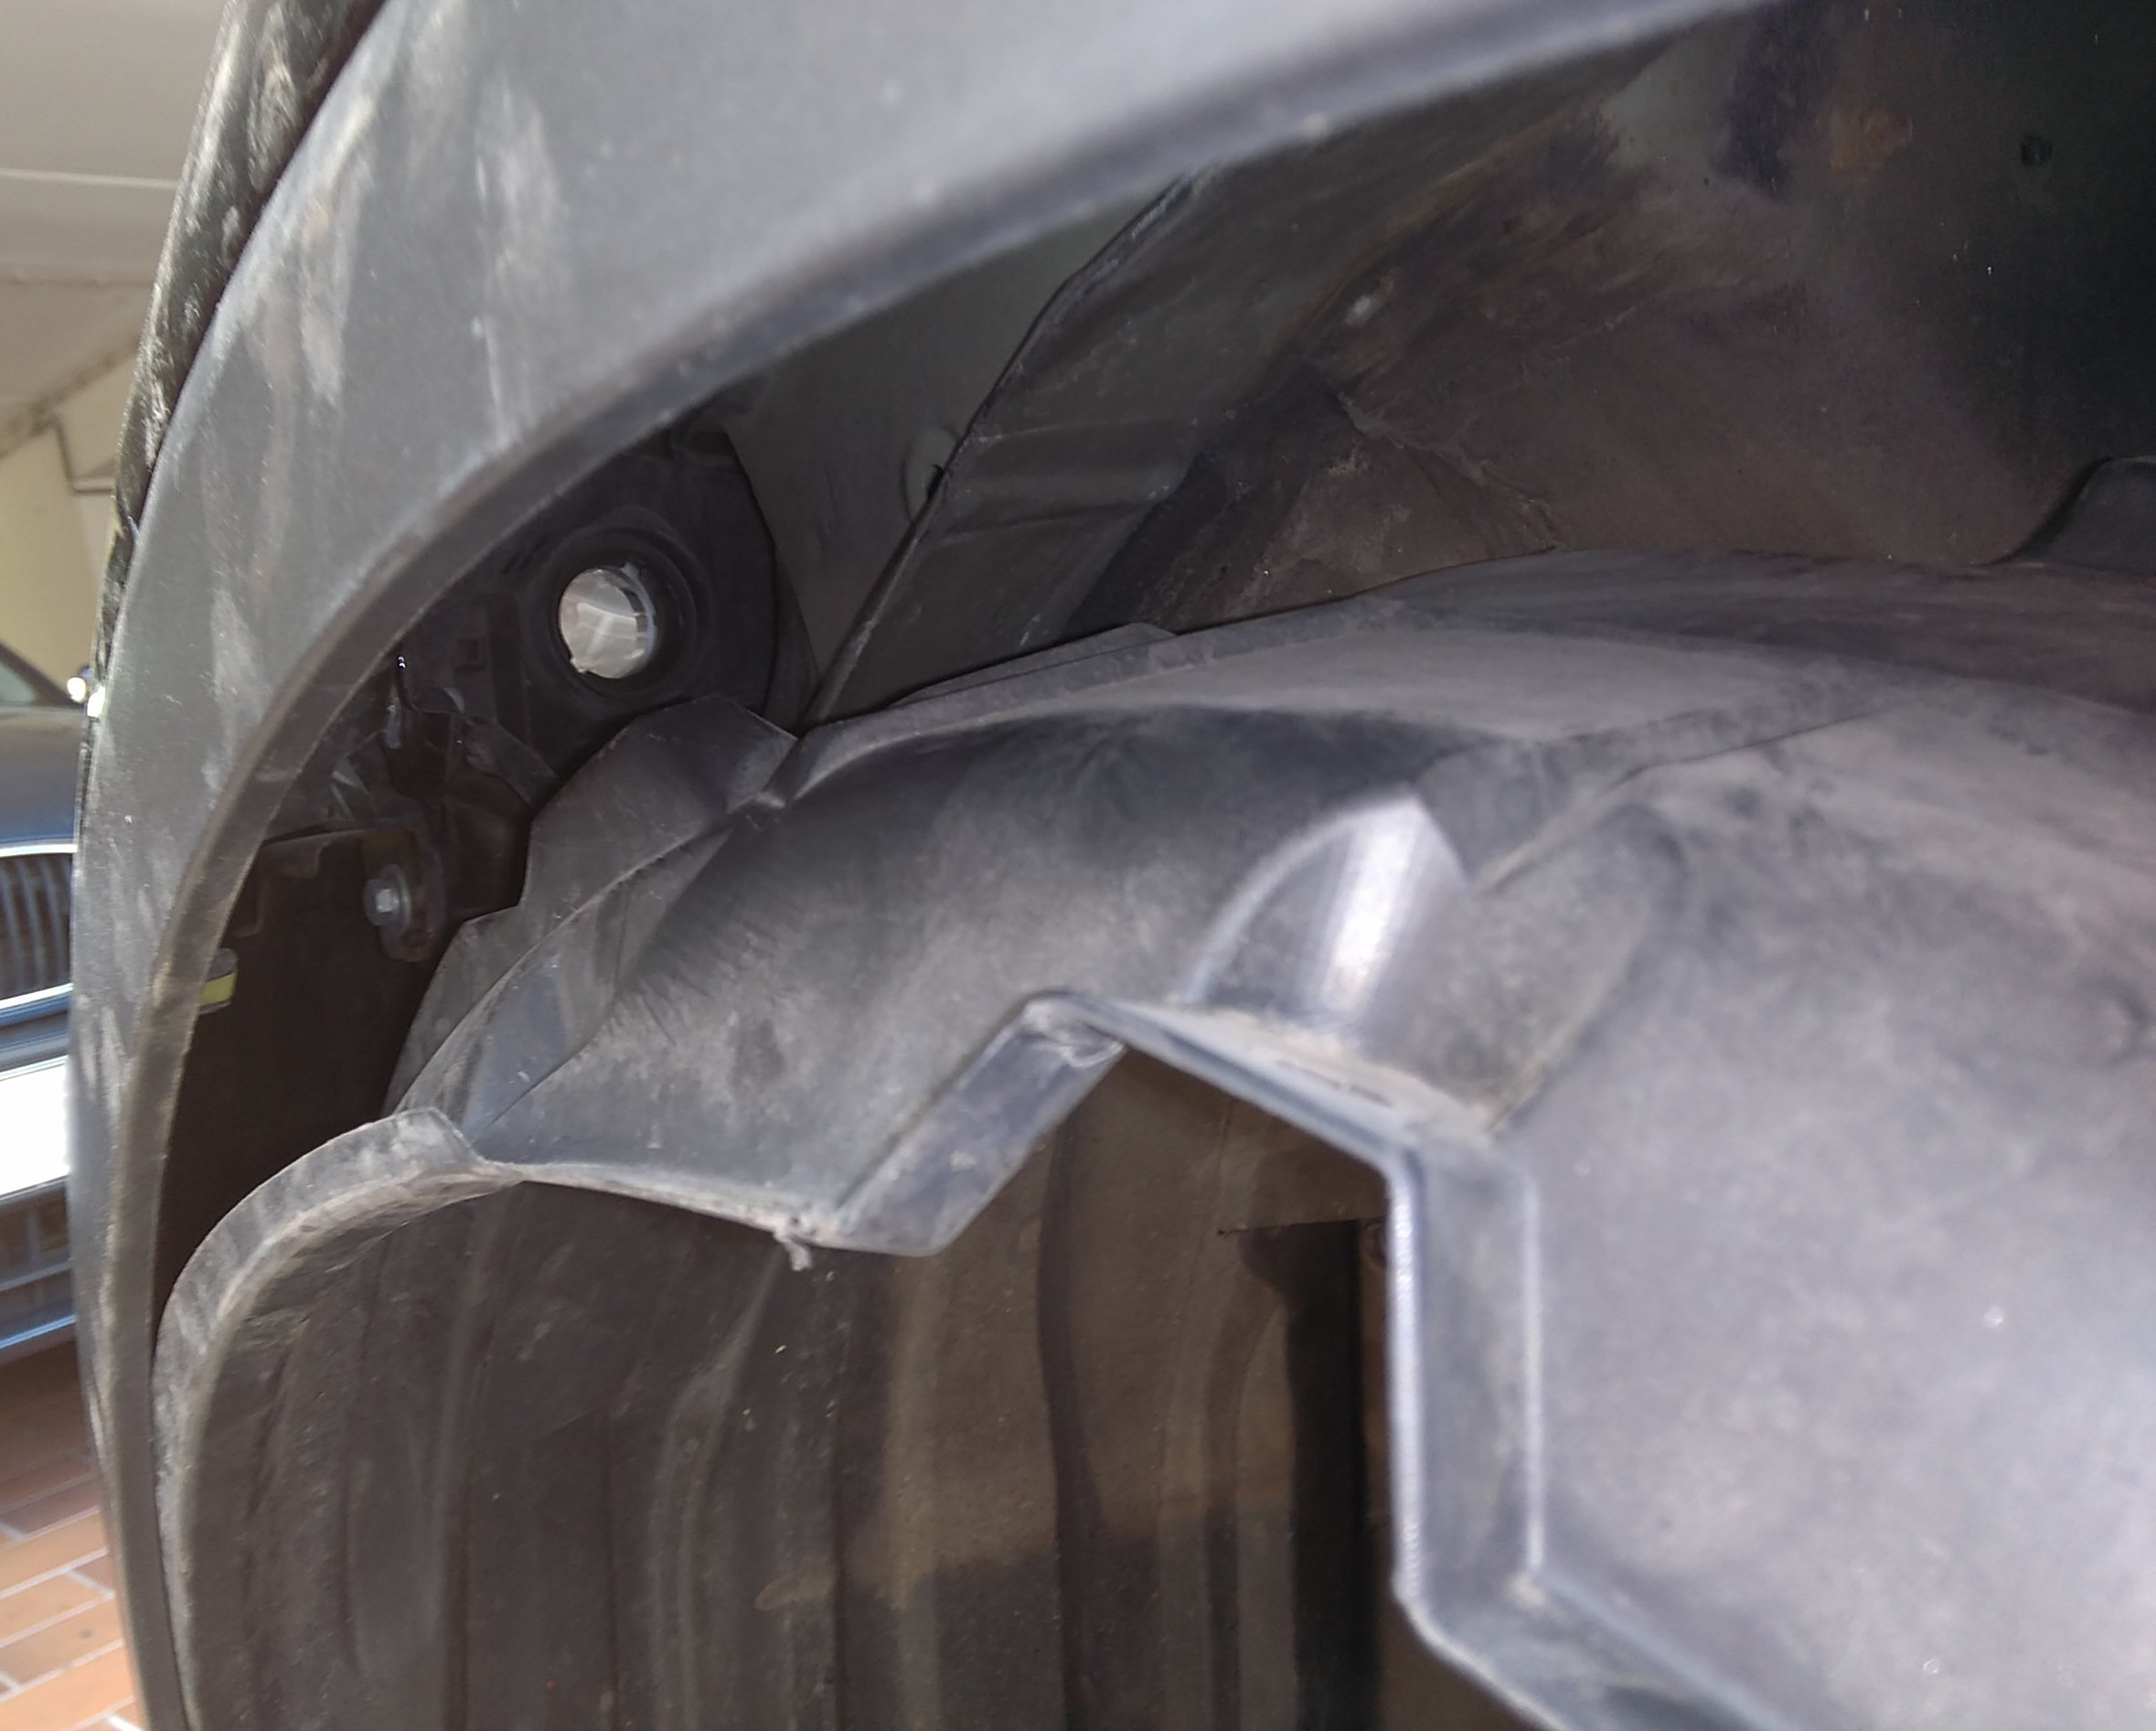
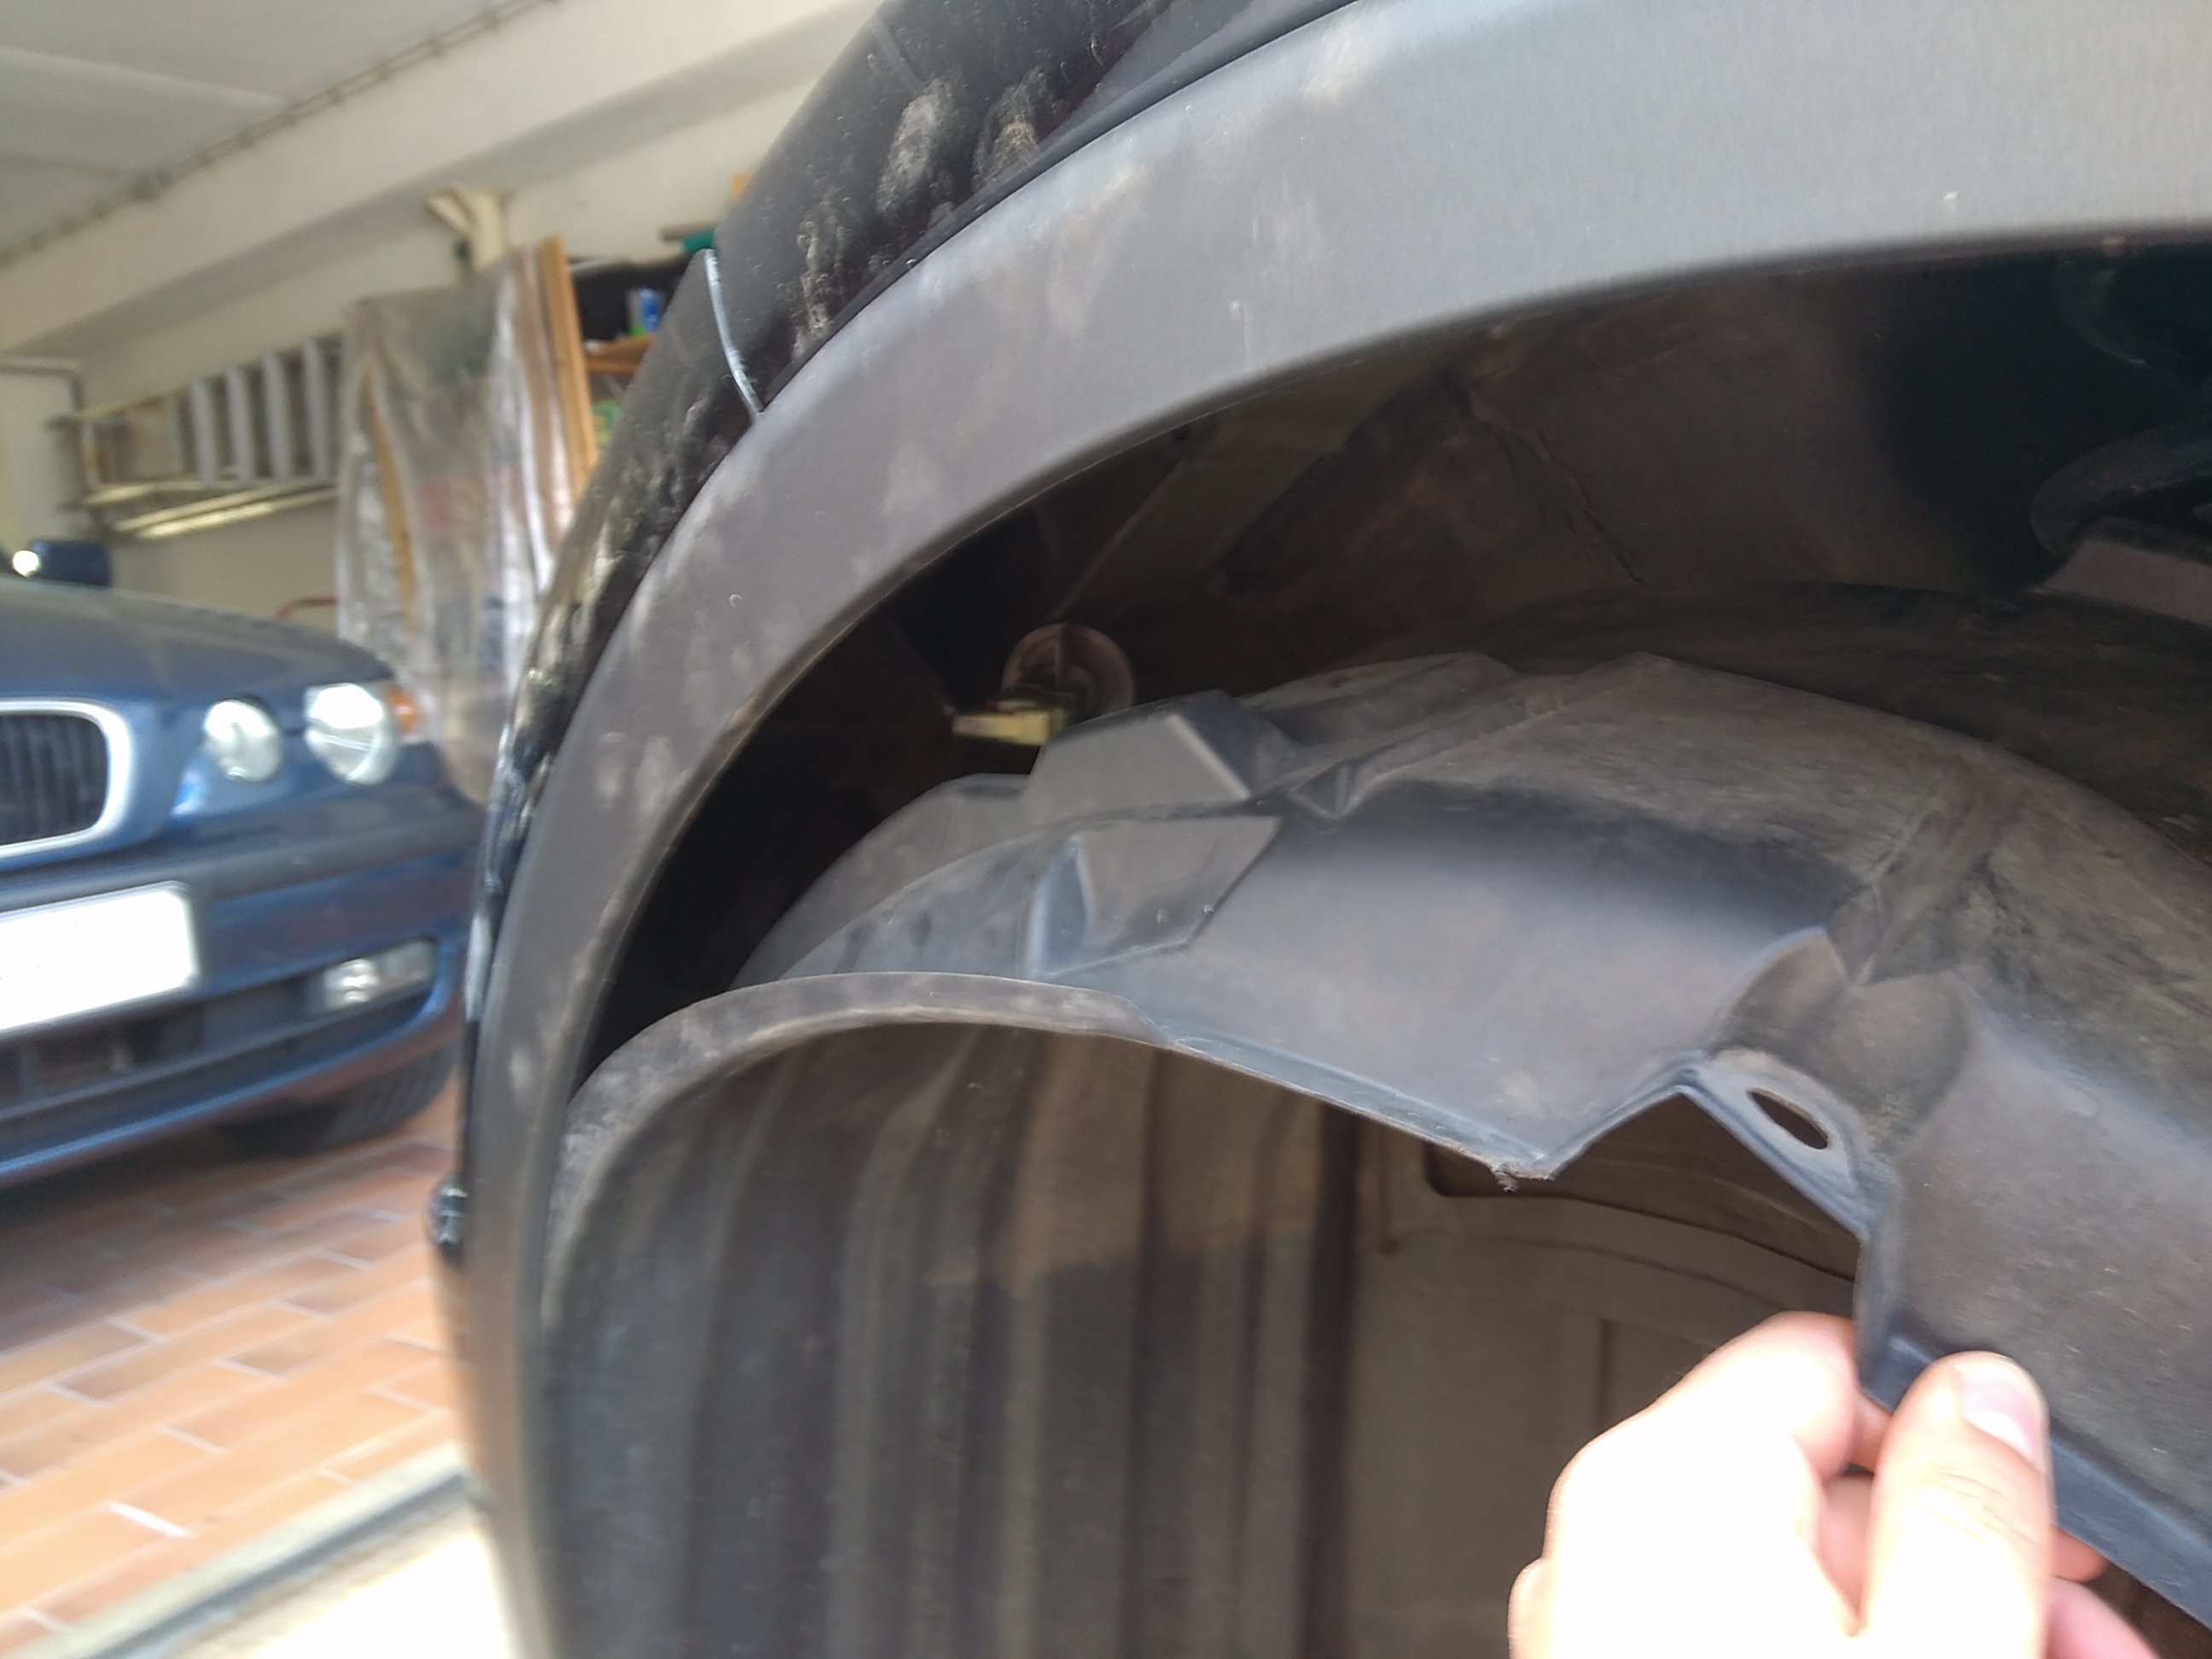
- Get under the plastic towards the from of the car to see the bulb mounted into the headlight
- Change the lamp
- Build all of it back together
I have used Philips Silver Vision PY21W, as it is silver on the outer surface, like the original Honda bulbs.
It does not pass exactly right into the socket, because of small pins on the cylinder sides, but it passes eventually and works.
Tip: It is often recommended to change both bulbs. In my experience the new lamps can burn quickly as well. Just change one and keep the new spare lamp for the future.
I haven't done it, but you should. The whole work experience changes. You see more, you break less.

The clips are of 4 different types, mark them to place them back where they belong after you are done, or, if you have good memory, remember it.
Usually to unmount the clips, you have to pull out carefully the central part of it, and then the whole clips out. Be sure to distribute your force evenly on the central cylinder hat of the clip, when you pull it out. Otherwise you will break the clip. It is not horribly expensive, but doing it right is better.
The picture shows the light coming through the whole in which the turn signal bulb normally sits.

Simply use clean gloves and replace the bulb as you would do with any other bulb, leaving no traces of fat on the lamp surface.
The lamp comes into a socket hanging on wires which you can see on the next photo.

The socket can be screwed in into the head light with a half turn of it by your hand. It is actually very handy.
Make sure that all the clips are on the right places.
Tip: the screws might be in rust and hold strong. Put the screwdriver head in the screw socket, and hit slightly a couple of times on the back side of the screwdriver. Then rotate to get your screw out easier. Lubricate the screws with copper grease or similar, when putting them back in place.
That's all folks.
Images copyright information
The photos on this page were taken by me.All rights for this image are reserved!!! You are not allowed to copy it, to reproduce it, to change it, to embed it or to otherwise use it without a written permission from my side!
Thanks for reading my blog!
 molotnikov.de